Servlet 3.0 新特性详解:https://www.ibm.com/developerworks/cn/java/j-lo-servlet30/index.html
ServletContainerInitializer :http://blog.csdn.net/songhaifengshuaige/article/details/54138023
Spring Web工程web.xml零配置即使用Java Config + Annotation
https://my.oschina.net/521cy/blog/702864
在现有项目写demo是,可能会遇到自己引入的servlet-api是3.0 但是实际使用的servlet-api是2.5的情况,导致教程中的方法不能使用。到时这个问题的原因可能是maven依赖中其他jar包依赖的servlet 2.5 导致导入了2.5的jar包,只需要找到是哪个jar包导入了2.5的到排除依赖即可。
idea在pom中右键Diagrams 搜索servlet 找到依赖2.5的包排除依赖
javax.servlet.jsp.jstl jstl-api 1.2 javax.servlet servlet-api org.glassfish.web jstl-impl 1.2 javax.servlet servlet-api
使用WebApplicationInitializer替代web.xml 配置servlet filter listener,其实就是将servlet对象的实例,add到servletcontext中。
public class WebProjectConfigInitializer implements WebApplicationInitializer { @Override public void onStartup(ServletContext container) { initializeSpringConfig(container); initializeLog4jConfig(container); initializeSpringMVCConfig(container); registerServlet(container); registerListener(container); registerFilter(container); } private void initializeSpringConfig(ServletContext container) { // Create the 'root' Spring application context AnnotationConfigWebApplicationContext rootContext = new AnnotationConfigWebApplicationContext(); rootContext.register(AppConfiguration.class); // Manage the life cycle of the root application context container.addListener(new ContextLoaderListener(rootContext)); } private void initializeSpringMVCConfig(ServletContext container) { // Create the spring rest servlet's Spring application context AnnotationConfigWebApplicationContext dispatcherContext = new AnnotationConfigWebApplicationContext(); //使用java config配置spring mvc dispatcherContext.register(RestServiceConfiguration.class); //使用xml配置spring mvc // dispatcherContext.setConfigLocation("/WEB-INF/spring/dispatcher-config.xml"); // Register and map the spring rest servlet ServletRegistration.Dynamic dispatcher = container.addServlet("SpringMvc", new DispatcherServlet(dispatcherContext)); dispatcher.setLoadOnStartup(2); dispatcher.setAsyncSupported(true); dispatcher.addMapping("/springmvc/*"); } private void initializeLog4jConfig(ServletContext container) { // Log4jConfigListener container.setInitParameter("log4jConfigLocation", "file:${rdm.home}/log4j.properties"); container.addListener(Log4jConfigListener.class); PropertyConfigurator.configureAndWatch(System.getProperty("rdm.home") + "/log4j.properties", 60); } private void registerServlet(ServletContext container) { initializeStaggingServlet(container); } private void registerFilter(ServletContext container) { initializeSAMLFilter(container); } private void registerListener(ServletContext container) { container.addListener(RequestContextListener.class); } private void initializeSAMLFilter(ServletContext container) { FilterRegistration.Dynamic filterRegistration = container.addFilter("SAMLFilter", DelegatingFilterProxy.class); filterRegistration.addMappingForUrlPatterns(null, false, "/*"); filterRegistration.setAsyncSupported(true); } private void initializeStaggingServlet(ServletContext container) { StaggingServlet staggingServlet = new StaggingServlet(); ServletRegistration.Dynamic dynamic = container.addServlet("staggingServlet", staggingServlet); dynamic.setLoadOnStartup(3); dynamic.addMapping("*.stagging"); }} 中有非常完整的示例,但是平时在使用spring mvc是静态文件处理
default *.css
怎么实现呢? 可以看到servlet mapping中的servlet name 为default,可以推测有一个默认的servlet呗祖册到了servletcontext。
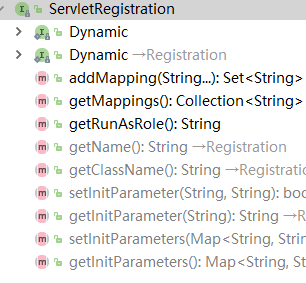
servletcontext可以使用addServlet配置servlet,在servletcontext源码中可以看到getServletRegistration方法返回ServletRegistration

在这里可以配置mapping,
servletContext.getServletRegistration("default").addMapping("*.css"); 和web.xml配置会实现相同的效果。
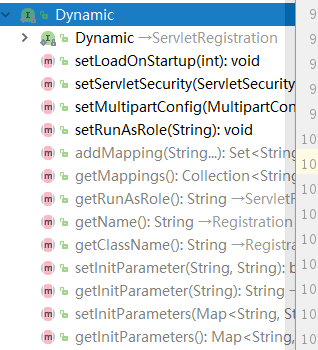
ServletRegistration.Dynamic是ServletRegistration得实现类可以进一步配置servlet的属性
